> ## Documentation Index
> Fetch the complete documentation index at: https://docs.monostate.ai/llms.txt
> Use this file to discover all available pages before exploring further.
# Quick Start
> Train your first AI model in 10 minutes
# Your First AI Model
Let's train a simple text classification model that can detect positive vs negative sentiment in text. This tutorial takes about 10 minutes and works on any computer.
**New to AI Training?** Check out the [Interactive Wizard Guide](/wizard/overview) for a more detailed walkthrough, including how to choose models, understand dataset sizes, and use wizard commands.
## Before You Start
Make sure you've [installed AI Training](/foundations/installation). You should be able to run:
```bash theme={null}
aitraining --version
```
If you haven't installed it yet, the quickest way is:
```bash theme={null}
# Install uv if you don't have it
curl -LsSf https://astral.sh/uv/install.sh | sh # Mac/Linux
# or
powershell -c "irm https://astral.sh/uv/install.ps1 | iex" # Windows
# Then install AI Training
uv pip install aitraining torch torchvision torchaudio
```
## Choose Your Path
We'll show the same task two ways. Pick the one you're comfortable with:
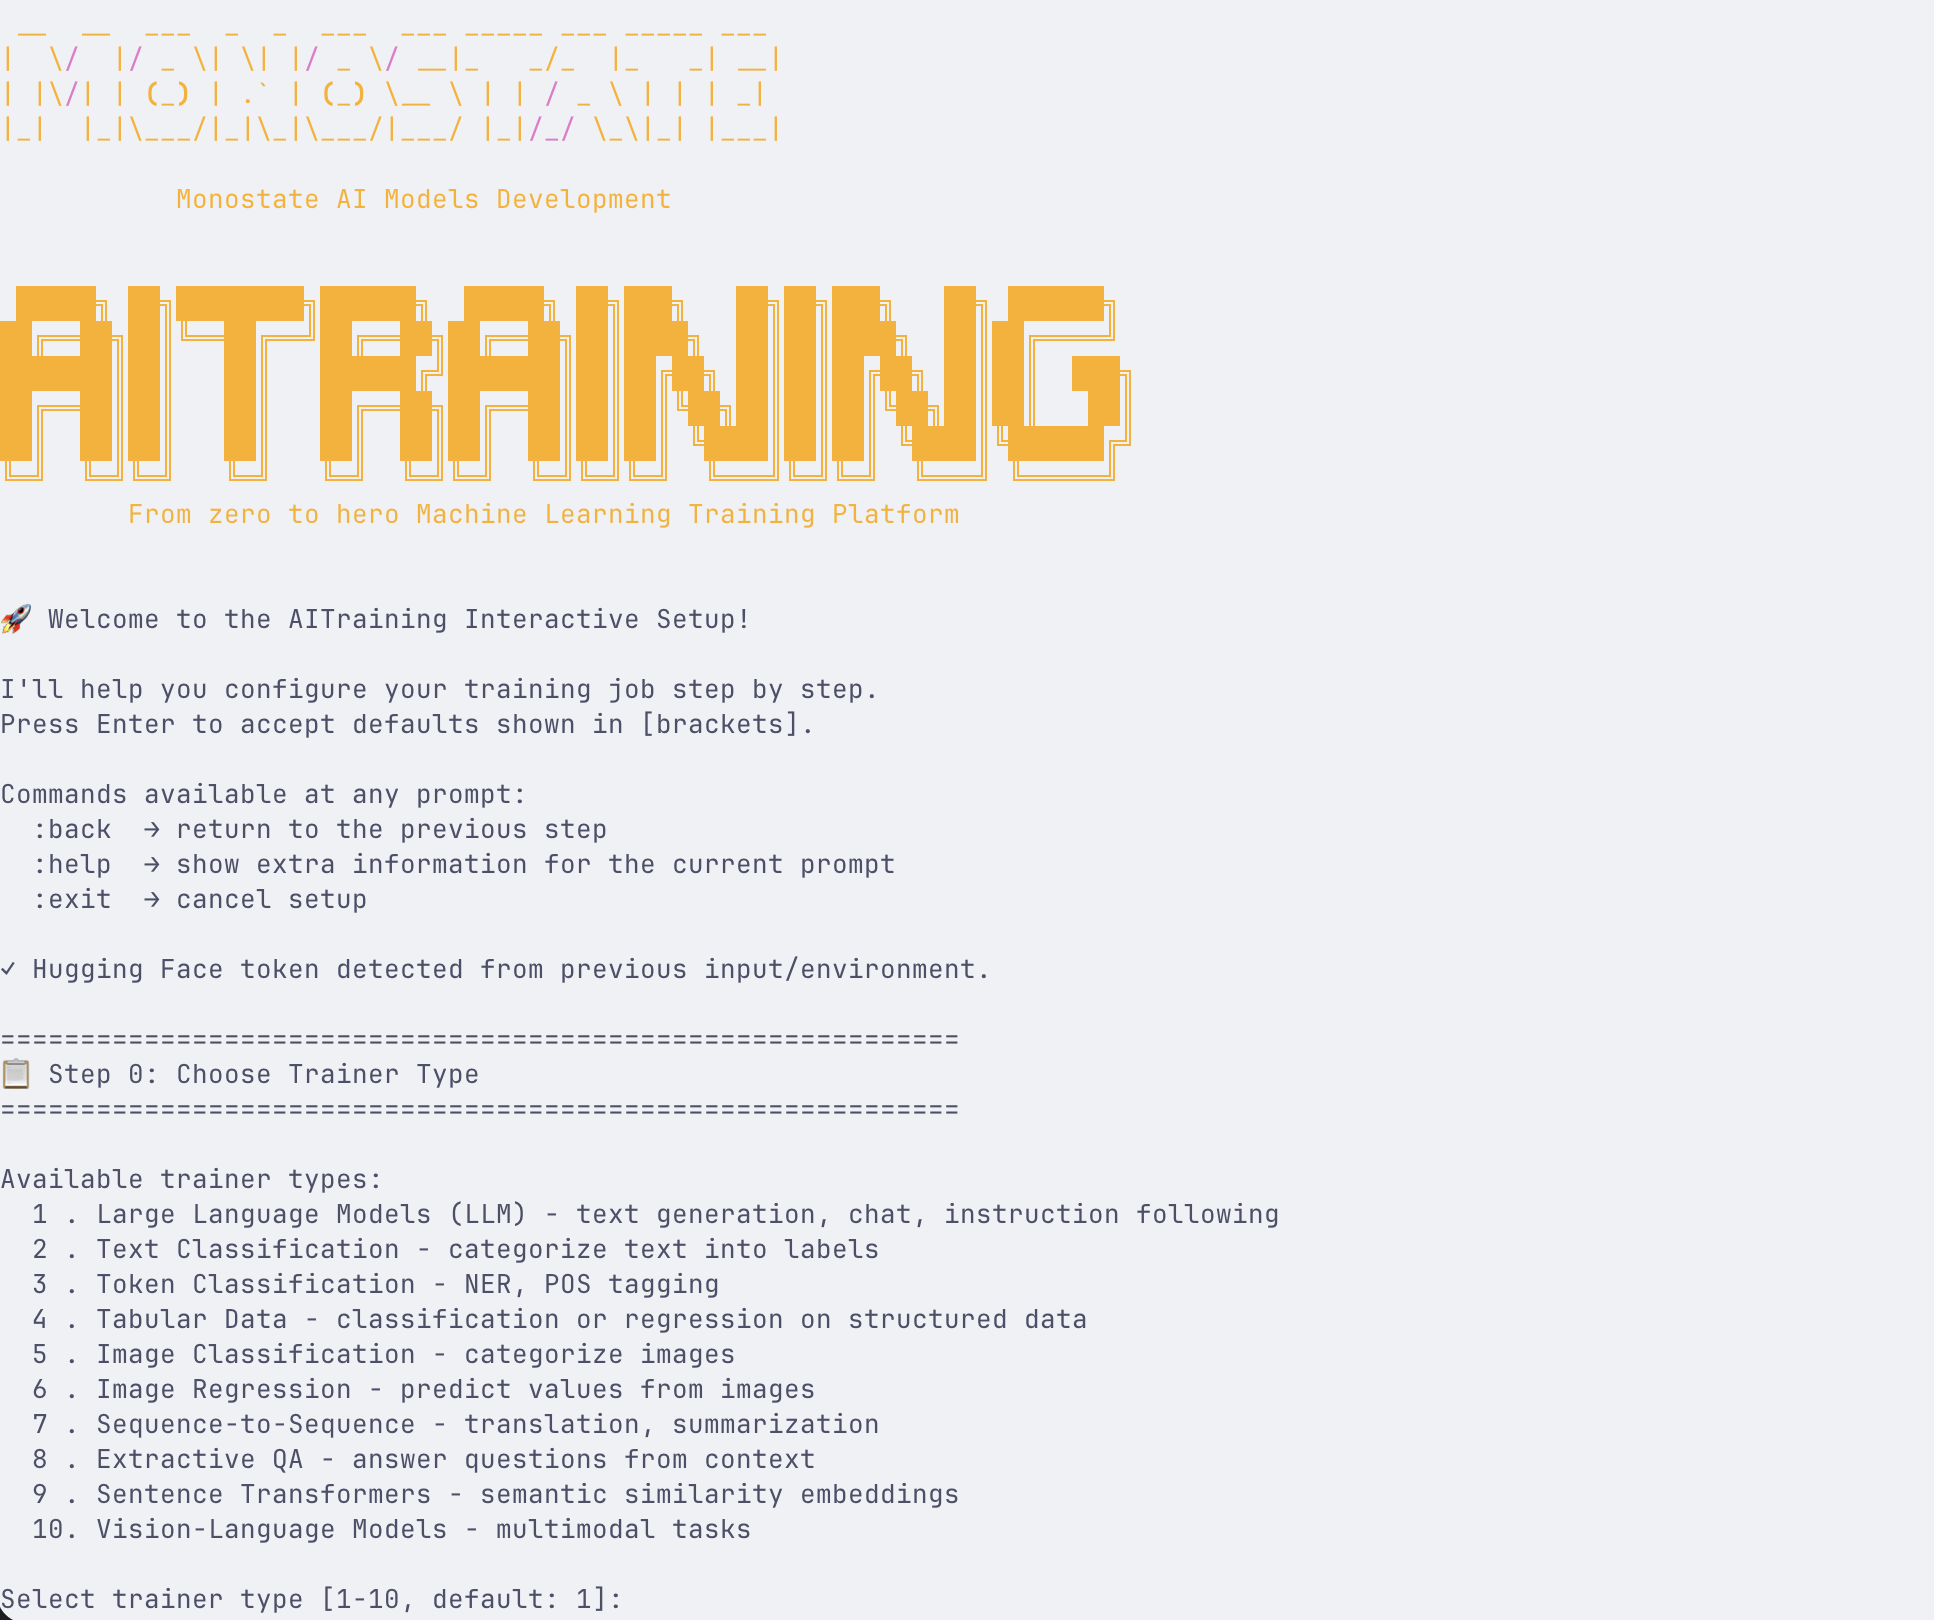
## Using the Interactive Wizard
### 1. Start the Wizard
Open your terminal and run:
```bash theme={null}
aitraining
```
The interactive wizard guides you through configuration.
### 2. Select Task Type
Choose **Text Classification** from the menu.
### 3. Prepare Your Data
Create a simple CSV file called `reviews.csv`:
```csv theme={null}
text,label
"This product is amazing! Best purchase ever.",positive
"Terrible quality. Complete waste of money.",negative
"Great service and fast delivery.",positive
"Broken on arrival. Very disappointed.",negative
"Exceeded my expectations!",positive
"Would not recommend to anyone.",negative
```
### 4. Follow the Prompts
The wizard will ask for:
* **Data path**: Enter `./reviews.csv`
* **Model**: Choose `bert-base-uncased` (or pick from trending models)
* **Text column**: Enter `text`
* **Label column**: Enter `label`
* **Output directory**: Enter `./my-sentiment-model`
**Wizard Commands:**
* `:help` - Get help for current step
* `:back` - Go back to previous step
* `:exit` - Cancel and exit
* `:search ` - Search for models/datasets
* `:sort
## Using the CLI
### 1. Prepare Your Data
Create a file called `train.csv`:
```csv theme={null}
text,label
"This product is amazing! Best purchase ever.",positive
"Terrible quality. Complete waste of money.",negative
"Great service and fast delivery.",positive
"Broken on arrival. Very disappointed.",negative
"Exceeded my expectations!",positive
"Would not recommend to anyone.",negative
```
### 2. Train the Model
Run this command:
```bash theme={null}
aitraining text-classification \
--model bert-base-uncased \
--data-path train.csv \
--text-column text \
--target-column label \
--output-dir ./my-sentiment-model \
--epochs 3
```
What each part means:
* `text-classification`: The type of task
* `--model`: Which pre-trained model to start from
* `--data-path`: Your training data file
* `--text-column`: Which column has the text
* `--target-column`: Which column has the labels
* `--output-dir`: Where to save the trained model
* `--epochs`: How many training rounds
### 3. Watch Training
You'll see output like:
```
Loading model bert-base-uncased...
Processing data...
Training started...
Epoch 1/3: loss=0.65, accuracy=0.67
Epoch 2/3: loss=0.42, accuracy=0.83
Epoch 3/3: loss=0.31, accuracy=0.92
Model saved to ./my-sentiment-model
```
### 4. Test Your Model
```bash theme={null}
aitraining predict \
--model-path ./my-sentiment-model \
--text "This is absolutely fantastic!"
```
Output:
```
Prediction: positive (confidence: 0.94)
```
## Using Python
### 1. Create a Python Script
Create a file called `train_sentiment.py`:
```python theme={null}
from aitraining import TextClassification
import pandas as pd
# Create training data
data = {
'text': [
"This product is amazing! Best purchase ever.",
"Terrible quality. Complete waste of money.",
"Great service and fast delivery.",
"Broken on arrival. Very disappointed.",
"Exceeded my expectations!",
"Would not recommend to anyone."
],
'label': [
'positive', 'negative', 'positive',
'negative', 'positive', 'negative'
]
}
# Save as CSV
df = pd.DataFrame(data)
df.to_csv('train.csv', index=False)
# Configure training
trainer = TextClassification(
model="bert-base-uncased",
data_path="train.csv",
text_column="text",
target_column="label",
output_dir="./my-sentiment-model",
epochs=3,
batch_size=8
)
# Start training
print("Starting training...")
trainer.train()
# Test the model
test_texts = [
"This is absolutely fantastic!",
"Complete waste of time and money."
]
predictions = trainer.predict(test_texts)
for text, pred in zip(test_texts, predictions):
print(f"Text: {text}")
print(f"Prediction: {pred['label']} (confidence: {pred['score']:.2f})\n")
```
### 2. Run the Script
```bash theme={null}
python train_sentiment.py
```
### 3. Use Your Model Later
```python theme={null}
from aitraining import load_model
# Load your trained model
model = load_model("./my-sentiment-model")
# Make predictions
result = model.predict("Best product ever!")
print(result) # {'label': 'positive', 'score': 0.95}
```
## What Just Happened?
You've successfully:
1. **Prepared data** - Created examples for the AI to learn from
2. **Configured training** - Selected a model and settings
3. **Trained a model** - The AI learned patterns from your examples
4. **Tested predictions** - Verified the model works on new text
5. **Saved the model** - Can use it anytime without retraining
## Understanding the Results
Your model learned to:
* Recognize positive words and phrases
* Identify negative sentiment patterns
* Make predictions on text it hasn't seen before
With just 6 examples, you got a working model. With more data (hundreds or thousands of examples), accuracy improves significantly.
## Common Next Steps
More examples = better accuracy. Try adding 50-100 examples per category.
Experiment with different base models like `distilbert-base-uncased` (faster) or `roberta-base` (more accurate).
Adjust epochs, learning rate, and batch size for better results.
Learn how to serve your model as an API or integrate it into applications.
## Try Other Tasks
Now that you understand the basics, try these:
* **Language Generation** - Train a chatbot with conversation examples
* **Image Classification** - Sort images into categories
* **Named Entity Recognition** - Extract names, places, dates from text
* **Translation** - Convert between languages
## Troubleshooting
* Reduce batch size to 4 or 2
* Use a smaller model like `distilbert`
* Ensure you're using GPU if available
* Add more training examples
* Ensure labels are consistent
* Try training for more epochs
* Check if your data is balanced
* Reduce batch size
* Use a smaller model
* Enable gradient checkpointing
* Use LoRA for efficient training
## What's Next?
* **[Understanding AI Training](/foundations/understanding-ai-training)** - Learn how training works
* **[Choosing Your Interface](/foundations/choosing-interface)** - Detailed comparison of UI, CLI, and API
* **[Model Types](/foundations/model-types)** - Explore different model architectures
* **[Advanced Techniques](/advanced/prompt-distillation)** - Learn about DPO, ORPO, and more
***
**Pro Tip**: Start with the interactive wizard (`aitraining`) to understand the concepts, then move to CLI for automation, and test your models with the Chat interface (`aitraining chat`).
 ### 1. Start the Wizard
Open your terminal and run:
```bash theme={null}
aitraining
```
The interactive wizard guides you through configuration.
### 2. Select Task Type
Choose **Text Classification** from the menu.
### 3. Prepare Your Data
Create a simple CSV file called `reviews.csv`:
```csv theme={null}
text,label
"This product is amazing! Best purchase ever.",positive
"Terrible quality. Complete waste of money.",negative
"Great service and fast delivery.",positive
"Broken on arrival. Very disappointed.",negative
"Exceeded my expectations!",positive
"Would not recommend to anyone.",negative
```
### 4. Follow the Prompts
The wizard will ask for:
* **Data path**: Enter `./reviews.csv`
* **Model**: Choose `bert-base-uncased` (or pick from trending models)
* **Text column**: Enter `text`
* **Label column**: Enter `label`
* **Output directory**: Enter `./my-sentiment-model`
**Wizard Commands:**
* `:help` - Get help for current step
* `:back` - Go back to previous step
* `:exit` - Cancel and exit
* `:search
### 1. Start the Wizard
Open your terminal and run:
```bash theme={null}
aitraining
```
The interactive wizard guides you through configuration.
### 2. Select Task Type
Choose **Text Classification** from the menu.
### 3. Prepare Your Data
Create a simple CSV file called `reviews.csv`:
```csv theme={null}
text,label
"This product is amazing! Best purchase ever.",positive
"Terrible quality. Complete waste of money.",negative
"Great service and fast delivery.",positive
"Broken on arrival. Very disappointed.",negative
"Exceeded my expectations!",positive
"Would not recommend to anyone.",negative
```
### 4. Follow the Prompts
The wizard will ask for:
* **Data path**: Enter `./reviews.csv`
* **Model**: Choose `bert-base-uncased` (or pick from trending models)
* **Text column**: Enter `text`
* **Label column**: Enter `label`
* **Output directory**: Enter `./my-sentiment-model`
**Wizard Commands:**
* `:help` - Get help for current step
* `:back` - Go back to previous step
* `:exit` - Cancel and exit
* `:search